Hand-sewn iPad case

wrap your ipad in a cozy sweater
My friend Luke asked me to make a pattern for an iPad case that could come together without the help of a sewing machine.

peaking out to ask if you want to watch trains. WE DON'T RIGHT NOW!
If you enjoy hand-sewing, then maybe this could be a fun and easy project for you too! I sew a lot of things on the machine, but I find a quiet hour of hand sewing particularly restorative for my soul. If you want to try it out for yourself then follow the steps below.
The finished iPad case will be 10 inches high by 8 inches wide. I use 1/2" seam allowances for the whole pattern.
Here are the materials:
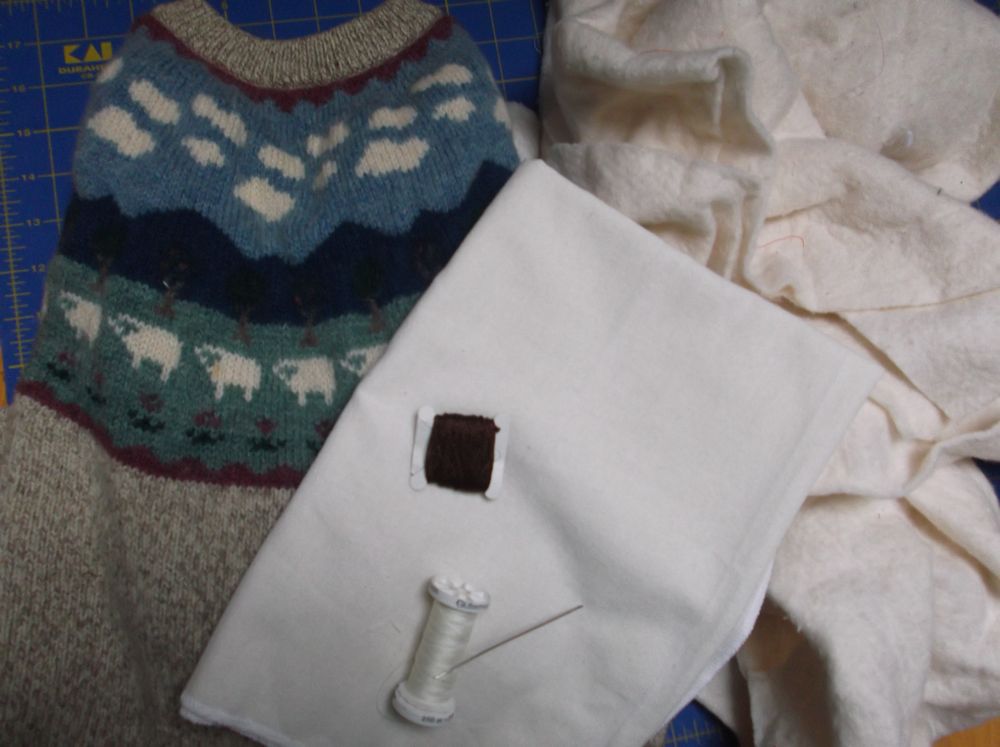
actually I ended up using brown thread instead of white. But if I wasn't doing a tutorial I would have used coordinating thread as shown above.
I need 3 fabrics: outer layer, puffy fabric, and lining. For the outer layer I'm using an old sweater. For the lining I'm using some white cotton. For the puffy layer I'm using quilt batting but you could use fleece or another layer of sweater. I also have thread, embroidery thread, and a needle. Oh, and in the end I use a button and a strand of elastic, but these are optional.
Cut one piece 11" x 9" out of each fabric. (I cut this piece out of the cotton first because it was the easiest to measure being the flattest. Then I traced that piece for the other two fabrics.)

the lining fabric cut out and on top of the outer layer
Note: If you are using a recycled sweater, it's best to cut off the sleeves and cut through the side seems first so you have a flat single-layer of fabric to work with.
Cut another piece 9 inches wide and 11 inches high with a trapeziod shape coming off the top for the closing tab. (because this part can be any shape I cut it free hand on the first piece and then traced that piece for the other two.) For those being finicky, the top of my closing tab was four inches higher than my other piece, and 5 inches less wide at the top. Just look at the photo if you're confused.
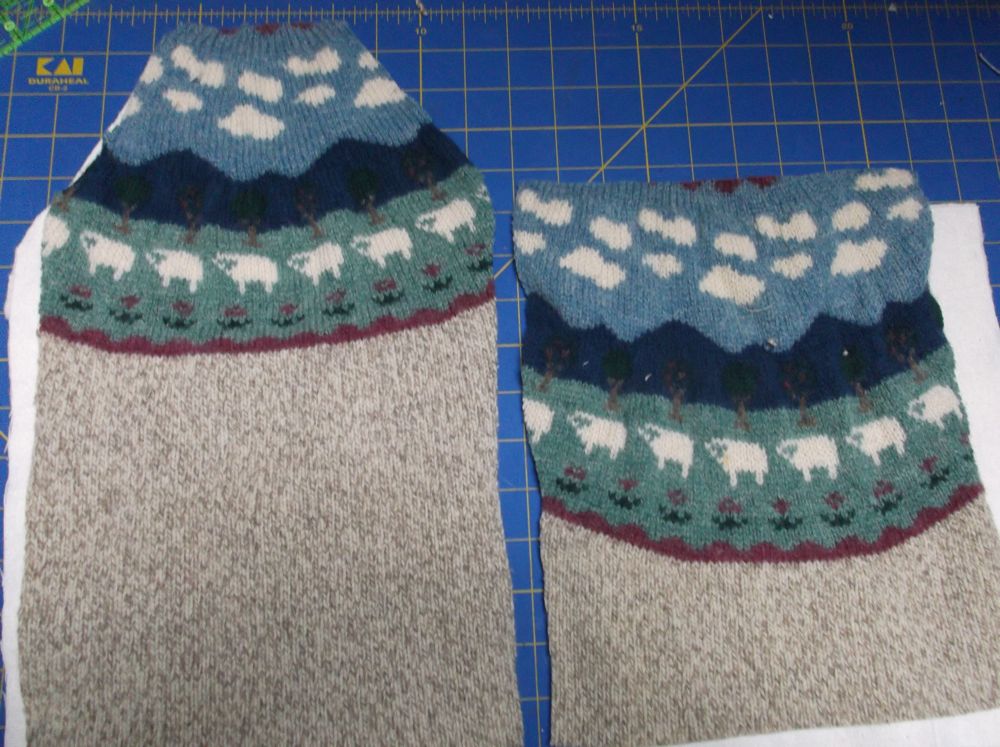
all the pieces, 6 in total
Now you'll sew each half of the ipad case seperately. Make a sandwhich, stuffing down first, then inner layer right side up, then top layer right side down. What's important is that the top and lining layer have right sides facing each other. Sew around this piece using a running stitch and a 1/2 seam allowance. Leave 2" unsewn for turning it inside out. I used regular thread for this part. I'll use dark brown so you can see what I'm doing.

one half of the ipad case sewn all the way around, less 2 inches
Note: my running stitches are 1/4 to 1/2 inches apart. This doesn't need to be your life's work because you will sew on top of this again later.
Do the same thing for the other half of the ipad case. I made the turning holes in different places so they wouldn't stack on top of each other when the case is assembled.
Now turn each piece right-side-out through the hole you left so you can see the top layer on one side and the lining on the other.

halfway done!
Lay the pieces together in the way they will look in the finished case.
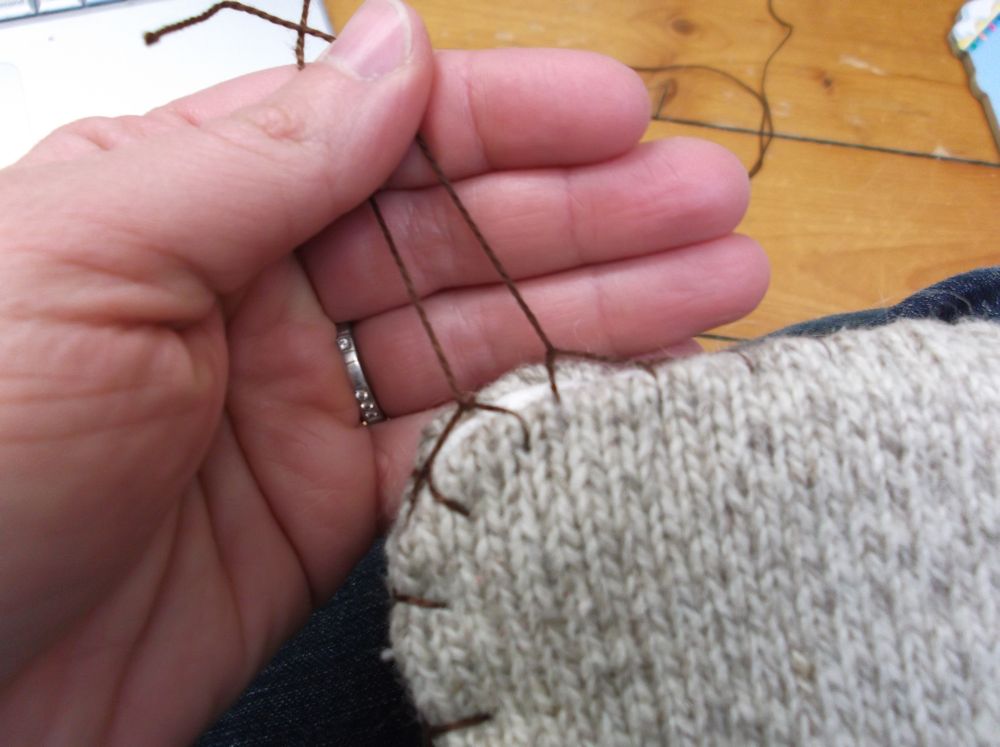
take a long piece of embroidery floss or yarn, (I used three lenghts of my 2 arms). Pull the needle from the bottom to the top through all the layers about 1/4" away from the edge. Lay the tail over the working thread.

the start of the buttonhole stitch
Take a stitch, 1/4-inch from the edge and 1/4-inch to the right of the previous stitch, entering from the upper piece. Pull the needle out through the sole keeping the needle on top of the thread coming from the previous stitch, as shown above. This is a buttonhole stitch.

finishing the first buttonhole stitch

keep it going! It gets fun after a while!
Continue around the whole piece with buttonhole stitches. When you get to the part where the opening for turning is, hold the edges folded closed as if they were sewn and sew the buttonhole stitch on top of them.
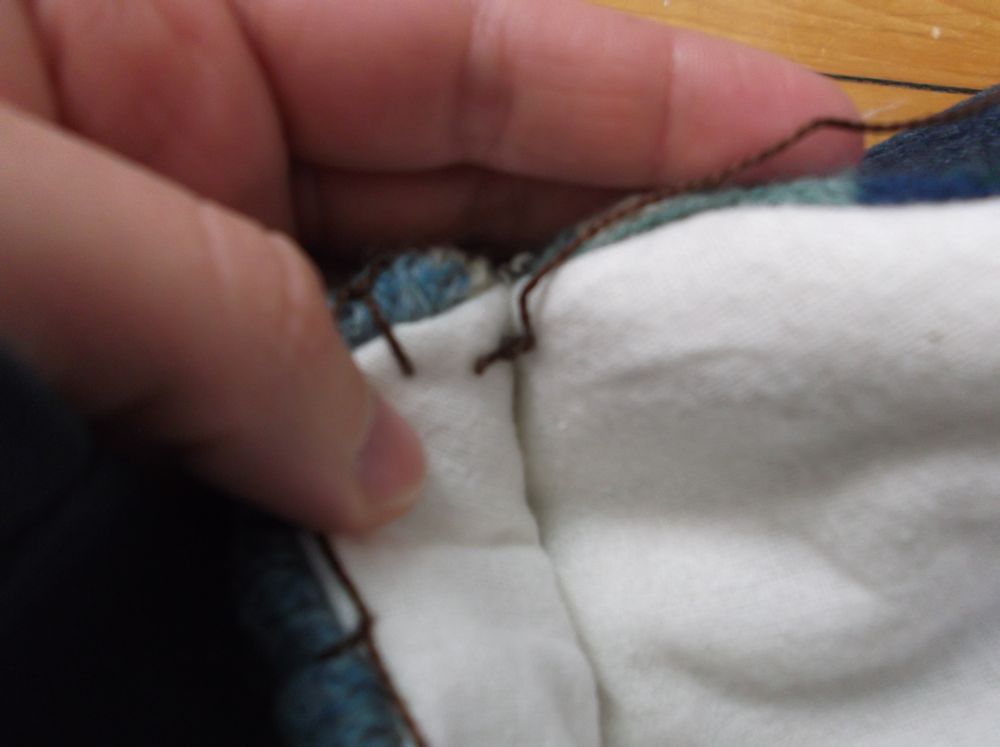
At some point you will reach the top of the case where the iPad goes in. Don't sew it closed! Instead, continue buttonhole stitches straight across the shorter part leaving the curvy part unstitched. Then rejoin when you get to the other side of the opening.

After I've sewn across the straight part of the opening and I'm rejoining the two sides of the case together.
And then continue down to where you started. Tie a knot with the beginning string.
two strings ready to be tied in a double knot. I confess I always use a triple knot for safety.
Now for the top flap. Attach a new long piece of embroidery floss to a stitch on the inside of the case. Button hole stitch around the top part. When you get to the end make another knot on the inside.
where you attach the string to edge the top flap
Lastly for the closure. I sewed a button to the short side of the case roughly 2/3 of the way up. For a button hole I threaded a piece of elastic through the lining and tied a knot.

Tah dah!
Tah dah!
So there you go, a soft iPad case that you can make without any loud whirrs that might wake the babies. If you make this and it gets you out of buying someone a Christmas gift, please consider kicking back some money to the hard-working moms at Embracing Hope Ethiopia.
And Luke, if you want this as a more printer-friendly PDF Dan can make that happen for you. Um, after Christmas.